


A lot of people don't realize that this pose is actually done with a composite. A composite is when you take 2 or more photos and combine them in photoshop or another editing program. I honestly believe this is the safest way to have this shot done. You shouldn't balance a 10 day old on their arms just like you wouldn't balance a 2 year old on a high wire. NOT SAFE.
As always, if you don't feel comfortable or confident achieving the pose, don't do it. This pose is not for everyone, and that's ok.
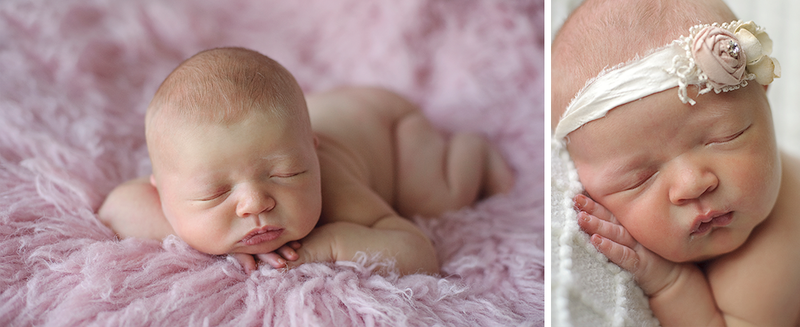
The first step is to take 2 photos. The first one, I get baby in position and while I hold onto their arms, mom or dad (I usually ask dad to help because his hands are larger and he usually can get a better grip) holds their head. As soon as baby settles, I will remove my hand and dad will hold baby's head up so there is little to no pressure of baby's head on his/her wrists and arms. After I take that shot, I will have dad put his other hand where my hand used to be and hold baby's arms. Dad will then remove his hand from baby's head and I will take another shot. These are the two shots I got:

Once you have them open in your editing program (I use Photoshop Cs4), I merge the 2 photos. I usually like to grab the one where dad is hold baby's arms and drag it onto the one where he is holding baby's head. I lower the opacity of the top layer to about 50% and line them up as evenly as possible. Now, when I line them up, I'm not lining up the whole picture. I'm only going to use about 10-20% of the top photo just to form the rest of baby's head in the second photo. I hope that makes sense! And if not, hopefully you can see what I mean in the next few steps ;)

Once I have them lined up, I return the top photo to it's original opacity and create a layer mask. I then selected my brush tool and for this photo, I set the size to about 500 and you want the opacity set to 100. Now, if my layer mask is all black, I'm going to choose the color white to paint over it and if my layer mask is white, I'm going to choose the color black to paint over it. I like to set my layer mask to black and paint with white so that I'm painting ON the photo I want. If it was opposite, I would be painting OFF the photo I don't want. Still with me?

In this next photo, you can see where I have painted ON the photo on top :)

Now that I have completely painted on the photo I want and everything looks pretty good, I can flatten my image. However, you can see in the photo below, that because my photos did not line up EXACTLY, I have a few areas I need to clone out.

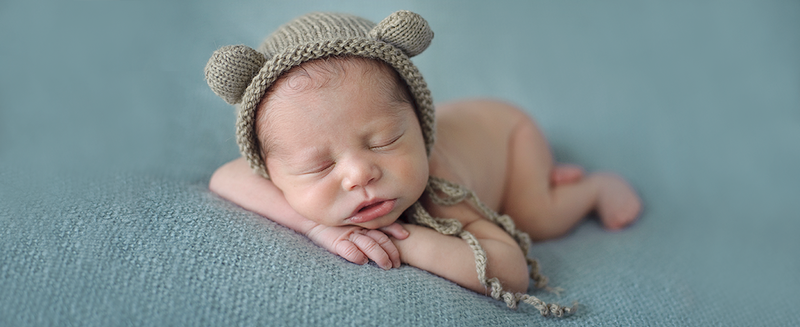
And here it is all finished!

Now you're free to process your photo how you would normally do it! I created the image below by using actions from Florabella, Keri Meyers, and Purely Studio.

Have a great weekend everyone! And don't forget to sign up for our newsletter!


5 Responses to “Chin In Hands Pose | Utah Newborn Photographer”
I love the behind the scenes tutorial! Great job as usual!!
Great info! Now if I just had a newborn to shoot! :)
Great tutorial!
I'm glad you put this out there, it worries me with so many who think they are photographers now, not understanding the care and support babies need for certain poses. It's great help to prevent someones baby from being injured by a 'photographer' who doesn't really know what we do. :-)
Glad to see photogs posting this tutorial. It's so important!
Post a Comment