• Slideshow Widget

    Showing posts with label tutorial. Show all posts

    Before & After | Utah Newborn Photographer

    May 27, 2013

    I shared a before and after on Facebook last week and I decided to share the tutorial on how I achieved the finished look!

    For this tutorial, I used a different photo than the one I shared on Facebook, however I followed the exact same steps.  This processing is very basic and I do this almost to every image I edit.


    Before I begin the steps, I want to stress how important it is to achieve a good SOOC (straight out of camera) image.  I define a good SOOC image as being properly lit, correct exposure, and in focus.  I attended the Lullaby Baby Workshop (hosted by Stephanie Krupicka and Michelle Glasser) back in October and it has changed my outlook on newborn photography completely!  I would not be where I'm at if it weren't for these two ladies!  If you are struggling with your SOOC images or nailing your posing, I STRONGLY suggest attending a newborn photography workshop (both of the ladies I mentioned above offer 1:1 mentoring! *hint*hint*hint*)

    Now, on to the tutorial!

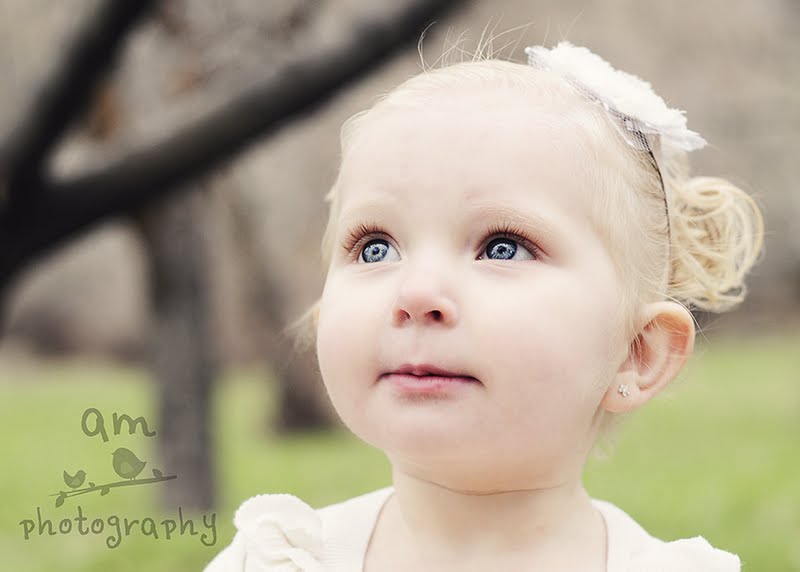
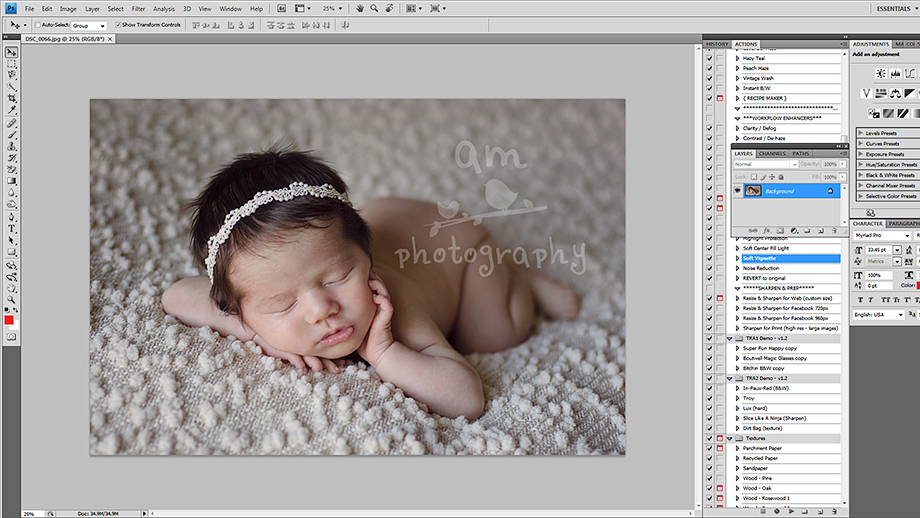
    Here is my SOOC image:


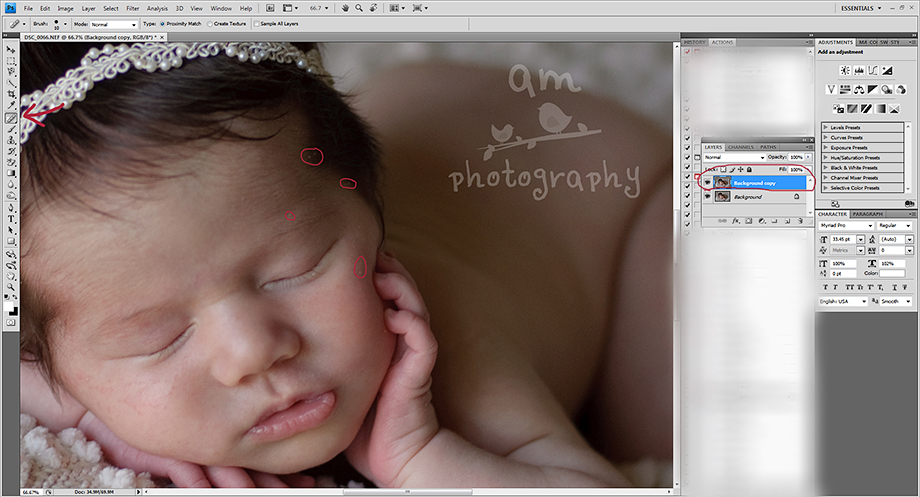
    My first step is to clear up any blemishes on baby's skin by using my 'bandaid' tool.  Right click and duplicate your background layer (ALWAYS work on a new layer in case you need to correct some mistakes.  It's easier to paint on and off your mistakes than to undo a million times and start over).  Zoom in on baby's face and with your brush size no bigger than the blemish, click/paint on each mark.  The trick is to keep your brush size small!  This step may be time consuming depending on your subject's skin, but it is totally worth it!


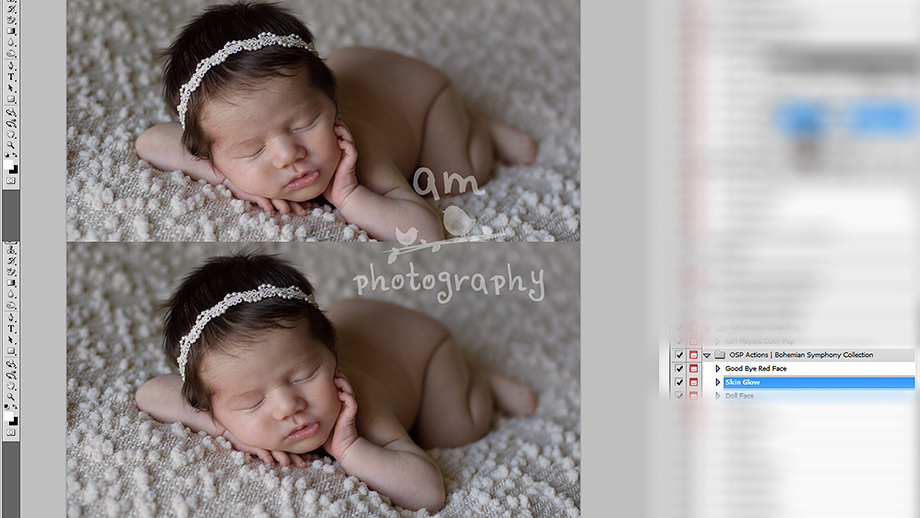
    My next step is to run an action by Oh So Posh Photography called Good Bye Red Face.  I use this action for EVERY newborn.  I take my brush at about 20-30% and 'paint' off the red areas.  You may have to adjust your brush size and opacity multiple times to get rid of red areas.  Be sure not to over do it and keep your opacity low (you may have to go over some areas a few times) as to keep the skin from looking green.


    Next, I use another of my favorite actions from Oh So Posh called Skin Glow.  This action offers a soft glow over baby's skin and gives the appearance of smooth skin (very similar to portraiture for those that don't have it).  I cannot stress enough how important it is to use this action (or portraiture for that matter) MINIMALLY.  This isn't Toddlers & Tiaras folks....keep their skin looking real!  ;)

    Using the same brush tool and a low opacity, 'paint' the action on over baby's skin being sure to avoid eyes, nose, and lips.  I'll admit that I get carried away with this action sometimes so I end up lowering the opacity of the entire action just a smidge  ;)


    This next step is optional, but I felt like my image needed a little sharpening.  I used an action called 'Light Crisp Details' by Paint The Moon.


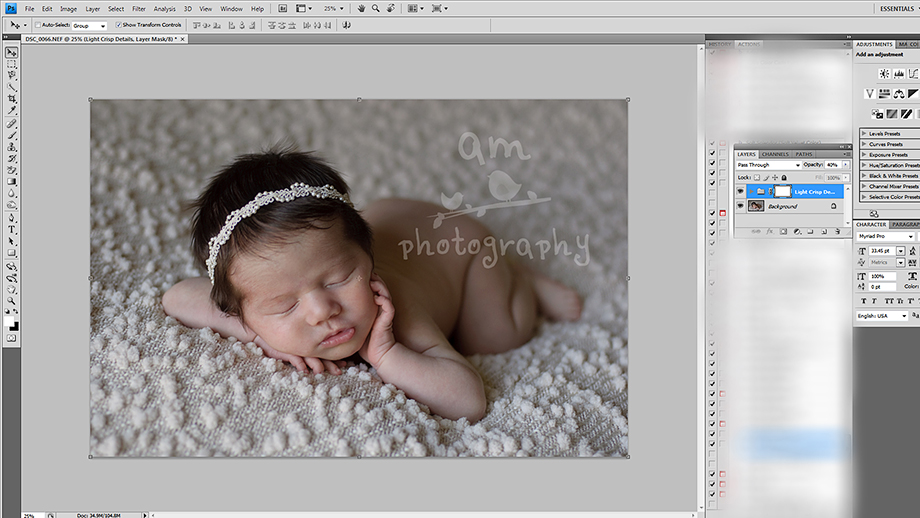
    The last two steps are the easiest!  I run my favorite two actions from Florabella; Classic Color from the Classic Workflow Collection and Milk from the Luxe II Collection.  You can make your own adjustments to each action, but for this particular image, I selected my opacity at 30% for the Classic Color and 20% for the Milk.


    And here is the finished look!


    Thanks for stopping by!  If you found this tutorial helpful please SHARE!  If you have some questions, feel free to leave them in the comment section below  :)


    Chin In Hands Pose | Utah Newborn Photographer

    Mar 23, 2012

    A lot of people don't realize that this pose is actually done with a composite.  A composite is when you take 2 or more photos and combine them in photoshop or another editing program.  I honestly believe this is the safest way to have this shot done.  You shouldn't balance a 10 day old on their arms just like you wouldn't balance a 2 year old on a high wire.  NOT SAFE.

    As always, if you don't feel comfortable or confident achieving the pose, don't do it.  This pose is not for everyone, and that's ok. 

    The first step is to take 2 photos.  The first one, I get baby in position and while I hold onto their arms, mom or dad (I usually ask dad to help because his hands are larger and he usually can get a better grip) holds their head.  As soon as baby settles, I will remove my hand and dad will hold baby's head up so there is little to no pressure of baby's head on his/her wrists and arms.  After I take that shot, I will have dad put his other hand where my hand used to be and hold baby's arms.  Dad will then remove his hand from baby's head and I will take another shot.  These are the two shots I got:


    Once you have them open in your editing program (I use Photoshop Cs4), I merge the 2 photos.  I usually like to grab the one where dad is hold baby's arms and drag it onto the one where he is holding baby's head.  I lower the opacity of the top layer to about 50% and line them up as evenly as possible.  Now, when I line them up, I'm not lining up the whole picture.  I'm only going to use about 10-20% of the top photo just to form the rest of baby's head in the second photo.  I hope that makes sense!  And if not, hopefully you can see what I mean in the next few steps  ;)


    Once I have them lined up, I return the top photo to it's original opacity and create a layer mask.  I then selected my brush tool and for this photo, I set the size to about 500 and you want the opacity set to 100.  Now, if my layer mask is all black, I'm going to choose the color white to paint over it and if my layer mask is white, I'm going to choose the color black to paint over it.  I like to set my layer mask to black and paint with white so that I'm painting ON the photo I want.  If it was opposite, I would be painting OFF the photo I don't want.  Still with me?


    In this next photo, you can see where I have painted ON the photo on top  :)


    Now that I have completely painted on the photo I want and everything looks pretty good, I can flatten my image.  However, you can see in the photo below, that because my photos did not line up EXACTLY, I have a few areas I need to clone out.


    And here it is all finished!


    Now you're free to process your photo how you would normally do it!  I created the image below by using actions from Florabella, Keri Meyers, and Purely Studio.


    Have a great weekend everyone! And don't forget to sign up for our newsletter!

    Weekend Recipe | Layton Utah | Newborn Photographer

    Feb 7, 2012

    I'm a couple days late for this to be a weekend recipe (oops!) but I'll go ahead and post it anyways  ;)


    Today, I will be taking this photo from this:


    To this:


    Ingredients:

    Photoshop CS4


    Steps:

    First, I used Keri Meyers action 'Take the Red Out' and adjusted the opacity to 75%

    He had a sore on the tip of his nose so I used my patch tool to get rid of it

    Then I used the spot healing brush to remove all the little blemishes on his cheeks (and anywhere else I saw them)

    I then went through all the steps of my skin smoothing tutorial found here and adjusted the opacity to 50%

    To make the photo pop a little bit, I ran Florabella's Classic Color from the Classic Workflow collection and adjusted the opacity to 40%

    Now, you could be done here, but I like to add a bit of extra softness by running Florabella's Milk action from the Luxe II collection.  I adjust the layers as such:  turn off the warm haze layer, turn of the more haze layer, pure milk (5-7%),  tone (10%), contrast (10%), lighten (10%)

    and wah-la! All finished  :)

    If you try this recipe out, please share a link in the comment section below!  I'd love to see  :)

    Skin Smoothing Tutorial {Before & After}

    Apr 18, 2011

    I've been trying to get a tutorial ready for everyone and I just haven't found the time.

    Until now.  :)


    Today, I am going to show you all how I do my skin smoothing.  This is in no way 'text book' stuff, but it's how I do it  :)

    I'm going to use this photo of a little cutie named Addison!  I'll show you how I take this photo:


    to this photo:


    Ok, Step 1:

    I crop ALL of my images before processing.  For my online proof gallery, I crop all of my photos to 5x7 (or in this case, 7x5).


    Step 2:

    Selet your eyedropper tool and click on a neutral (neutral meaning not blown out or red spots) spot on your subjects face.


    Step 3:

    Then you'll want to duplicate your photo layer (right click - duplicate layer).  Select your brush tool on the left hand side.  Make sure you have a nice size brush (not too big or too small) and set the opacity between 20% - 30%.


    Step 4:

    Paint all over your subjects face.  You may need to go over some areas twice.  Try to avoid areas like the eyes, nose, and mouth. It's ok if you go over these areas, I'll show you how to fix it  :)


    here is a little before and after:


    Notice how I painted over her nostrils?

    to fix that, we go to

    Step 4:

    Click on the icon under your layers that looks like a circle inside of a rectangle.  This is a layer mask.  Making sure you click on the layer mask, take a black brush and 'mask back' your bottom layer.  This will erase what you painted on.


    Now you're done with the skin!   Next,  I just did my 'eye pop' tutorial and ran Florabella's "Cashmere" from Luxe I.  If you don't have these actions, you need to get some!  :)

    and Wa-la!  You're done :)


    Eye Pop Tutorial

    Jan 15, 2011

    I've decided to put together a little tutorial for everyone!  And who better to help me demonstrate than my adorable little blue-eyed nephew?!  :)


    I use this tutorial for almost every close-up, whether they have blue eyes or brown!  :)


    I made this tutorial in Photoshop Cs4 but you may be able to do the steps in Elements if you have the same functions  :)


    First, start with your SOOC (straight out of camera) image.  You may do some minor adjustments (like brightening, cropping, etc.) but I would refrain from using actions until after you do the eye pop.  Your subject's eyes may turn out a little wonky ;)


    Next, go to your sidebar and select the magnetic lasso tool.  You can use another tool, but I find it easiest to select with the magnetic lasso.


    Zoom in on your subject's eyes and select both of them.  MAKE SURE you have selected the "add to selection" button first!!  If you don't, your first selection will be erased.  Be sure to select as much of the iris as possible (and not the white part!)


    Once you have both eyes selected, select ctrl+J to set the eyes to their own layer and turn the background layer off (it'll be easier to edit just the eyes without the distraction of the rest of the image).


    Next, go to your sidebar and select your dodge tool.  Set the range to highlights and the exposure anywhere from 10-30.


    Paint over the entire eye a couple (or a few!) times.  Then you want to go back up and set the range to midtones and set the exposure anywhere from 10-30.


    Paint over the eyes again.  Next, go back to your sidebar and select your burn tool.  Then you will want to set the range to shadows and the exposure to 10 (I wouldn't go any higher).


    Paint over the eyes again.  Don't worry if your subject's eyes are looking a little 'creepy' that's how they're supposed to look!  lol 


    Zoom out so you can see your full image on the screen.  It should look something like this (note: your photo will not look exactly like this!  the center should be lighter and the outer ring should be very dark.)


    Next, go up to Filter and scroll down to 'Other' then select High Pass.


    Set the radius to 10 pixels


    Now, before you turn your background layer back on (trust me, if you thought the eyes looked creepy before....) set your 'eye' layer to "soft light"


    NOW you can turn your background layer on  :)


    Your subject's eyes are going to look VERY overdone, so to fix that, set your layer opacity low (I've chosen 35 for mine, but it will vary to your photos).  REMEMBER: Less is More!  There's nothing worse to ruin your photo than those brightly overdone fake-looking eyes.  So PLEASE, don't over do it!  :)


    And wah-la!  You're done!  You can brighten them up a bit by creating a curves adjustment layer (or various other techniques) and creating a clipping mask to your 'eye' layer.

    Here's a little before and after for you.....notice the subtle eyes?  :)


    Interested?

    Jan 11, 2011

    I was thinking of doing a tutorial on how to make your subjects eyes 'pop' but I wanted to see how many people would actually be interested first.

    So, if you would be interested, please leave a comment  :) 

    And it's totally free!!  lol


    And what's a post without pictures?


    Especially of my favorite little man!!