WOW. I am SO behind on blogging.....
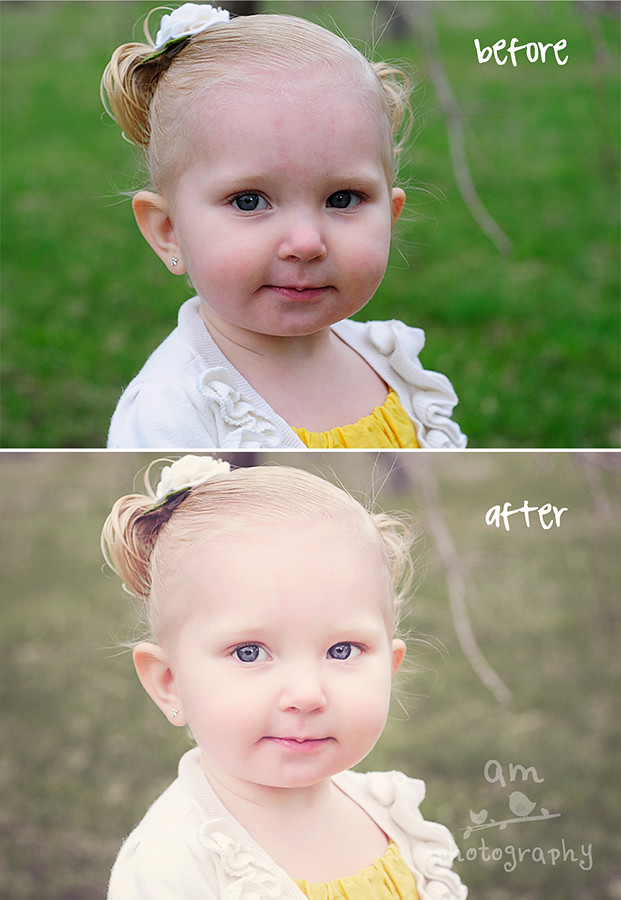
Awhile back, I decided to introduce some of my "Recipes" of editing a photo. And it's about time I got around to it ;)
Awhile back, I decided to introduce some of my "Recipes" of editing a photo. And it's about time I got around to it ;)
I will take you from the first step and go over everything I did to achieve the final product. I will also include all the information of where I got the actions, etc.
Ok, here goes. I use this "Recipe" quite often and it's definitely one of my favorites! I call it:
A Pinch of Honey

What you will need:
- editing program (I have Photoshop CS4)
I always start by cropping my photos to 5x7. I then ran 'Light & Dark' and using my brush painted over her face to brighten it up. I also reduced some of the redness from her skin. I then ran Portraiture on a separate layer and turned the opacity low (I think about 30%).
I desaturated the yellows (about -20) because the action will add more yellow. Next, I created a Selective Color layer adjustment. I selected Green and set as follows: Cyan (-40), Magenta (45), Yellow (35), Black (45). Flatten image.
I then ran 'Jane' from Florabella's Luxe II collection and set the opacity between 30-50% (it varies from photo to photo). Next, I ran 'Milk & Honey' from Florabella's Color & Haze collection. Ungroup the folder and make the following adjustments: Honey Tint (35% opacity), Milk Haze (15% opacity), Honey Haze (10% opacity), turn off Brighten Up and Lighten layers.
I then ran 'Jane' from Florabella's Luxe II collection and set the opacity between 30-50% (it varies from photo to photo). Next, I ran 'Milk & Honey' from Florabella's Color & Haze collection. Ungroup the folder and make the following adjustments: Honey Tint (35% opacity), Milk Haze (15% opacity), Honey Haze (10% opacity), turn off Brighten Up and Lighten layers.
Then I ran 'Pastel Tints & Hazes' from Florabella's Color & Haze collection. Turn on Lavender Tint and Tiffany Blue Tint. Set Tiffany Blue Tint to 15% opacity.
The very last step, I just added a slight vignette at about 10-15% opacity.
And that's it! Feel free to leave any questions in the blog comments below :)


Post a Comment
I love reading your comments! They make my day :)